Wednesday 2 November 2022

proposal for history of Liverpool

 My proposal: History of Liverpool  

I have been commissioned to produce promotional material for the regional culture Award with the objective of promoting the range of cultures that make up each of the Cities and towns within our region. I believe the best way to do this is to direct people's attention to the architecture of Liverpool as the buildings themselves hold vast amounts of history. 


Purpose 

The Title for my promotional campaign is short, blunt, and straight to the point, "History of Liverpool” or possibly “HOS” for short. To promote my campaign, I will produce a series of posters intended for both traditional print advertisements that can be displayed around the city, and I will take advantage of digital advertising as well on social media platforms. 

The aim of my campaign is to educate and bring awareness to the rich history of Liverpool through a series of posters including famous landmarks of the city and providing a QR code people can scan to gain more information, for this I will have to create a website or use my preexisting blog, the QR codes generated will lead to webpages that give a detailed description of the buildings history. 


Digital advertising 

The advantage of digital advertising is that popular social media services such as Instagram, Facebook, and twitter all utilize algorithms to push content to intended audiences who have shown interest in related products, so not only is it free advertisement but your content is more likely to reach the intended target audience. However, these websites all provide the option to pay for your product to be prioritized and more likely to be promoted by the algorithms, ensuring that your campaign will have a better chance at being successful. 

The same is true for google advertisement spots, this is a service you must pay for to have your product to be promoted on sites via popups, but they use the same targeted algorithms to reach intended audiences.  


Target audience  

The target audience for this campaign is overly broad in the sense that I am aiming to target both residents of the city and tourists to educate those in the city and try to influence tourists to visit the historical landmarks. To appeal to such a broad audience, I will have to ensure that my campaign is inclusive and does not alienate any cultural or religious groups. The content included in my campaign should also be suitable for all ages as not only are my posters going to be in the public eye, but I am aiming to appeal to all age ranges  


Legal and ethical issues 

Copyright will have to be taken into consideration when producing the posters, all assets either must be my own, royalty free or given permission by copyright holders to use their assets. 

Location permissions, some businesses will charge you to display your posters on their buildings and will charge you to use their billboards and other designated advertisement spots. 


Budget and equipment 

£10 to £200 for poster prints depending on the size, quality and location as some businesses may charge to display your posters on their buildings and billboards. 

Monday 13 June 2022

Blair witch program advertising campaign

 The Blair witch project  is a American horror film that was released in 1999 and is a fictional story of three students filmmakers who hike out into the woods to film a documentary of a local legend known as the Blair witch,they all disappear however their footage is recovered and this is what the viewers see.

Despite the movie not living up to its viewers expectations its still regarded by many as one of the greatest advertisement campaign ever, from missing person leaflets, an interactive website and chat rooms, along side the trailers succeeded in capturing the public interest in the film as the goal of theses tactics where to create confusion.


The missing person leaflets that where fabricated and distributed led people to the website Devoted website of The Blair Witch Project which allowed people to uncover the backstory of the legend consisting of fake police report and news stories all of which started to create discussion online in chatrooms further spread confusion and the reach of the films audience.

This form of marketing mainly targeted at teenagers and young adults who have a better understanding of online platforms and are more likely to access websites and spread word through forums and chatrooms, at least at the time this would of been the case.


despite the overall success of the campaign it was also surrounded in controversy due to concerns of the ethics of the project,this is because the material was so convincing a lot of people thought it was real creating mass hysteria and outrage.They where eventually forced to change how the promoted the film and the cast began appearing on talk shows to clear the air and change public perception.

The Blair witch project is a clear example of how media can have effect on its audience especially linking to theory of the hypodermic syringe model, which is to suggest that the message is received and fully accepted by the audience. The directors successfully convinced a lot of viewers that the Blair witch project was real and this created overall panic, and their was cases of anxious people contacting police linked to the film.


Thursday 19 May 2022

unit 20 design and prep

 this is all the Photoshop and in design work i created to build the skills i needed to create my product,especially in Photoshop where i used the skills i learnt to produce my posters such as feathering images,applying filters, special pasting images into text and liquefying text

Photoshop-assigning text to a shape


I assigned text to a shape by left clicking a shape I made which assigns the text to the shape, I can see where this would be useful, creating logos and such, however I didn't utilize this in my horror poster designs 

photoshop: feathering images
I used the select tool and increased the feather to create this feather effect
crtl+shft+i
then delete
I used feathering in my The Greg billboard poster and the effect worked well to blend the character into the surrounding darkness amplifying the effect of the poster.

testing filters on photoshop


I applied different filters to 9 separate photos of cats to change their appearance

1)dry brush

2)cut out

3)diffuse glow

4)dark strokes

5)chalk and charcoal

6)glowing edges

7)accented edges

8)sumi-e

9)ocean ripple

Filters really help bring  a piece together and I used them in my ring inspired poster to get the grain textures.

creative text in photoshop


I used the text tool to add text, changed the font and font size and then warped the text by rasterizing layer  and free transforming
I used the same skills here to create The Greg posters, I rasterized the text in my posters so I could better manipulate them, like for resizing, creating masks and applying liquify.

picture in text photoshop

to create this image I first added the text and then rasterized it so it became an image, I then used the magic wand holding shift to select all the letters. Once I had done this all I had to do was special paste into an image creating a clipping mask.

I then created a reflection by first grouping both the image and text layer together, and then duplicating the layer, I then flipped image and skewed it using free transform, and finally I used the gradient tool to get a kind of fade effect
I used this in The greg final poster where I put the character into the text, as well as adding filters and gradients.

InDesign first thumbnail 

Photoshop liquify 

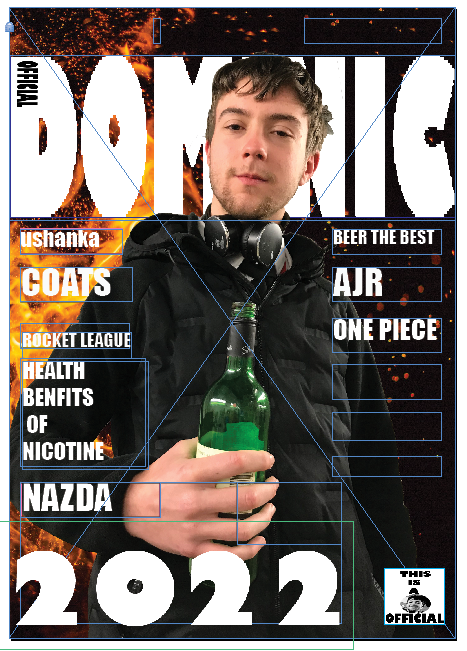
i created a thumbnail for the front page of a magazine using adobe InDesign


Using the liquify tool I warped the text to follow the follow the folds of the flag to create the illusion that's its actually on the flag, to do so I had to rasterize the type first so photoshop would treat the text as an image.

I also changed my brush size when liquefying depending on how big of an area i was trying to warp

If I spent more time i could probably make it better, using blending modes may also helped

I used the liquify tool to create the bleeding text effect in the Greg billboard and its really effective for distorting text in general


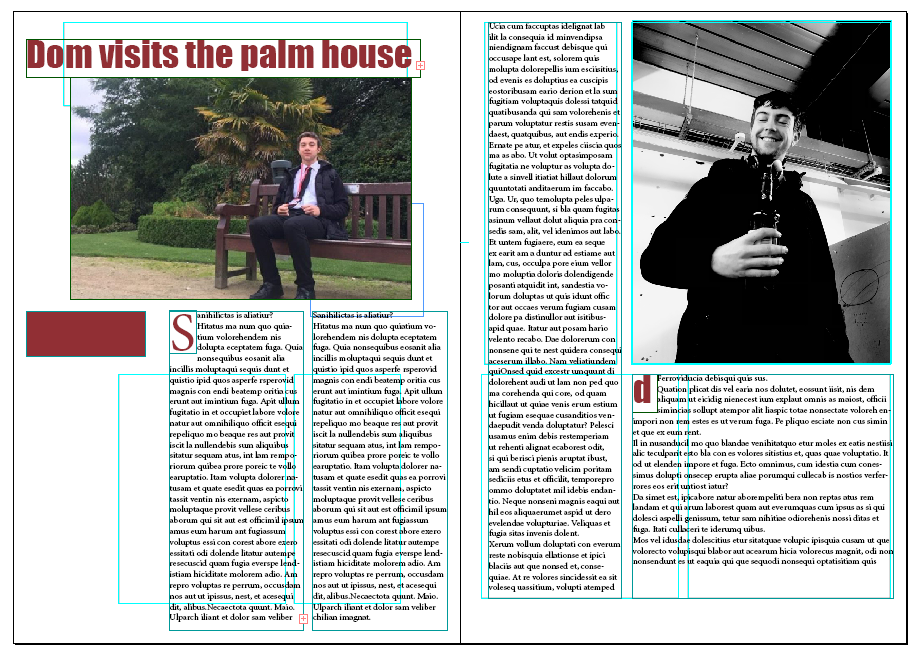
indesign double page spread


indesign film magazine


define pre set brush

unit 20 task 3 Dominic magazine 
to create this i first applied the cut out filte3r to the picture to simplify the image, I then added the bob Marley text, selected it with the quick select tool, next I edit-define brush pre-set to create a kind of stamp, after this i used the quick select tool again to select a colour and finally just used the brush pre-set I created to add the text to the selected area

unit 20 task 3 indesign magazine final double page spread 

Tomlinson InDesign Task 4

To create this broadsheet front page I used InDesign.

I started by creating by making my page 375 x 597mm,with 6 columns and a centimeter border all round.

I then designed a layout using the rectangle and frame tool so i knew where my text and images would go.

Next I quickly added all the text by creating text boxes and filling them with place holder text.

after this I added the masthead and headlines which was difficult to get exact, I struggled with the sizing and fonts but in the end I think I got something very close, making sure I used a serif font for my masthead and a sans font for my headlines.

once I done all this I added the images, cropping and and resizing them using tools writing InDesign, that being free transform. 


on fire text 

I created this by creating 3 duplicates of the same text layer and changing the colour of each of them to yellow, orange and red. Once I done this i offset each layer slightly and added gaussian blue to blend it all together, I then grouped the 3 layers and rasterized it.

after this I warped the text with the liquify tool to create the flame effect, when I was happy with this I then duplicated this layer and free transformed to create the reflection, I also added a gradient to make it fade.

to finish I changed the brightness and exposure of the text to make it brighter adding to flame effect.


Added more blur


Tomlinson Indesgin Challenge Task 5


To create this magazine cover I first made a page standard A4 sized(210x297) with 3 columns and a centimetre margin. I then quickly planned out my layout using the rectangle tool and rectangle frame tool. To create the blue fading background I had to go into photoshop and using the gradient tool, and then importing the image into InDesign.

To have my main image be covering my masthead partially i had to send the text to the back by going;

object/arrange/send to back

I also had to warp the text, shown by the 'lose your gut' headline, by using the free transform tool.

To create the circle I just used the ellipse tool and filled the colour with the same colour as my strength and numbers, this process was pretty much the same with every shape I added.


ice cold shaun


to create this I did the same method I used to create the on fire Shaun by making 3 text layers, all different colors and slightly offset from each other. I then grouped all the layers into one, rasterized the layer and used liquify to warp the text. After that I used the plastics wrap filter to create the shinning frost effect, I then duplicated the layer and inverted the image to create the reflection, I also added a gradient to make it fade

faces from large brushes


to create these images I created a new layer with a solid colour of black, I then used the eraser tool and selected different brushes with some feather to let the image behind peer through and for it to be blended, I also added some Gaussian blur

special paste into objects for juxtaposition`


to create these images I used the magnetic lasso tool and special paste 

to  insert images into other images, I applied some filters and overlays to a few images to.
This could of been used to create the The Greg poster with the face peeing through the text however I just cut out a mask with the text pretty much getting the same effect.

morphing 2 images together
 to create this image I overlayed the hr Giger image of the image of the cat, matching them eyes and mouth. I then used the lasso tool with 20% feather to merge the 2 images, after this I then used the blur tool to blend it more. Then finally I added poster edge filter.

proposal for history of Liverpool

  My proposal: History of Liverpool     I have been commissioned to produce promotional material for the regional culture Award with the ...